🧩 Assembly
Overview
This guide explains how to assemble the Octopus across its four main configurations:
- Static Standard: fixed deployments (e.g., air temperature sensing)
- Mobile Standard: adds GPS for mobile deployments
- Extended: adds air quality sensing (SPS30)
- Vision: uses Nicla Vision for camera-based applications
Estimated assembly time: ~20 minutes
1. Static Standard Configuration
(Base setup – required for all other configurations)
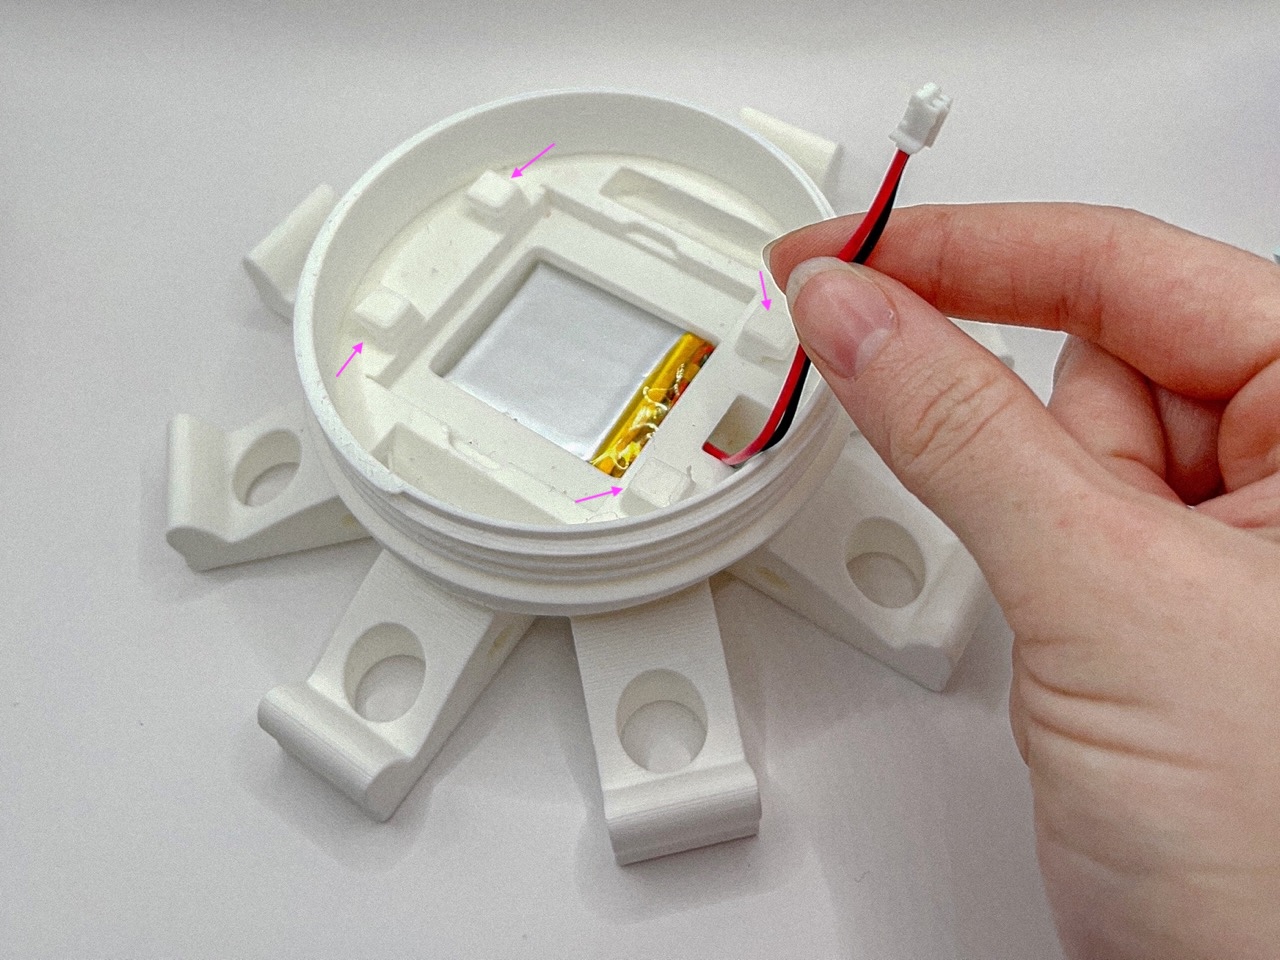
Step 1: Prepare Bottom Layer
Place the battery into the bottom section. Secure the battery using elastic bands around the built-in posts (indicated by the pink arrows) to prevent movement.
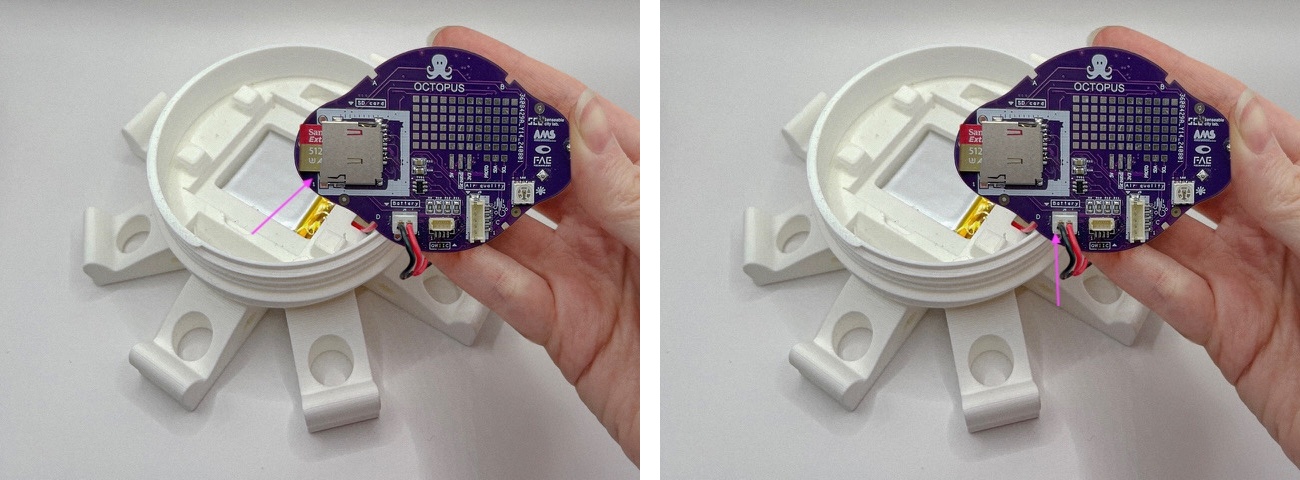
Step 2: Prepare Top Layer
Insert a micro SD card into the PCB designated slot. Connect the battery's plug to the PCB at the port labeled “battery”.
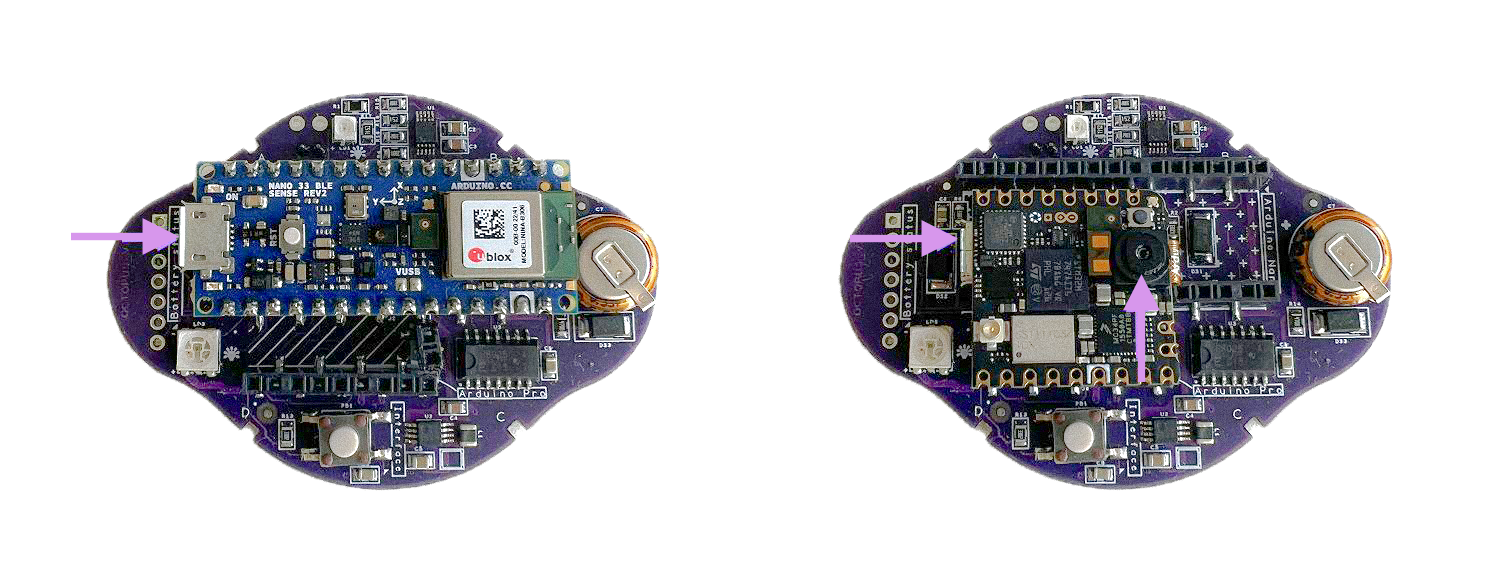
Step 3: Mount the Arduino into the PCB.
⚠️ Important orientation rule:
The USB-C connector should point in the opposite direction of the supercapacitor (yellow circular component).
Incorrect placement will prevent the device from powering on.
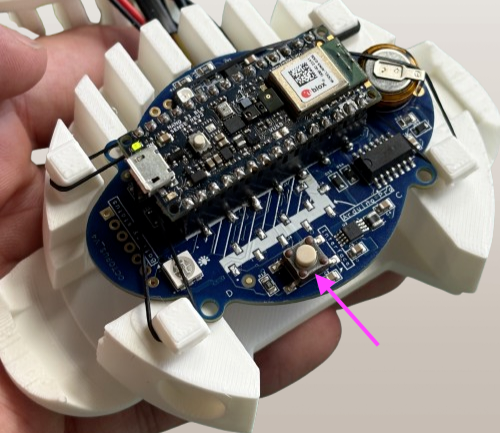
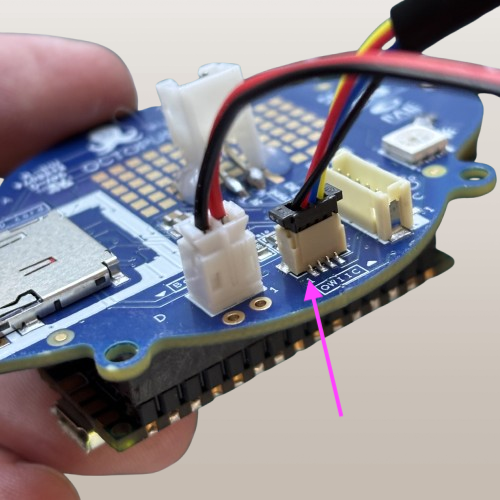
Step 4: Place the PCB into the enclosure
Secure it with elastic bands. Turn on the board using the white onboard button (pink arrow)
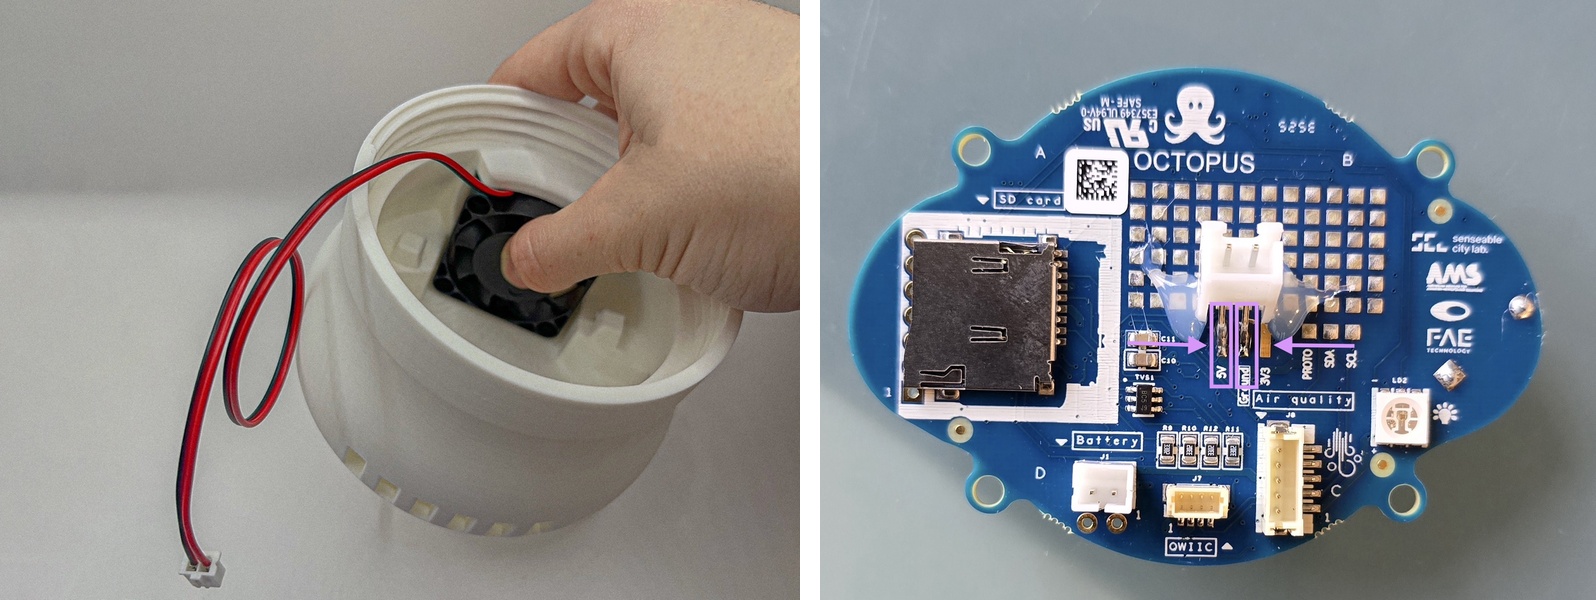
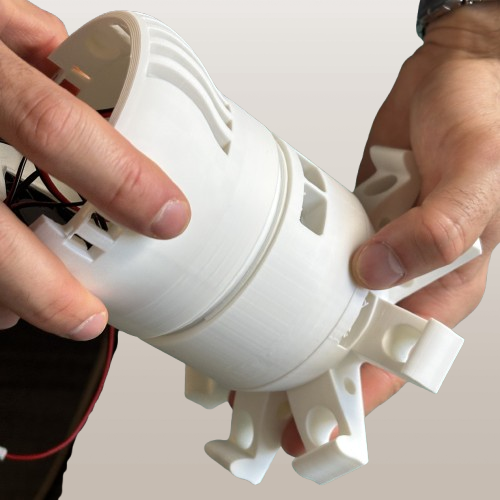
Step 5: Fan placement
The fan is required for reliable operation in real-world deployments and to maintain proper airflow.
Insert the fan into the head enclosure, ensuring the blades face inward. Connect the fan cable to the 5V/GND port on the PCB
Step 6: Final Assembly
Attach the top and bottom enclosure sections by screwing them together.
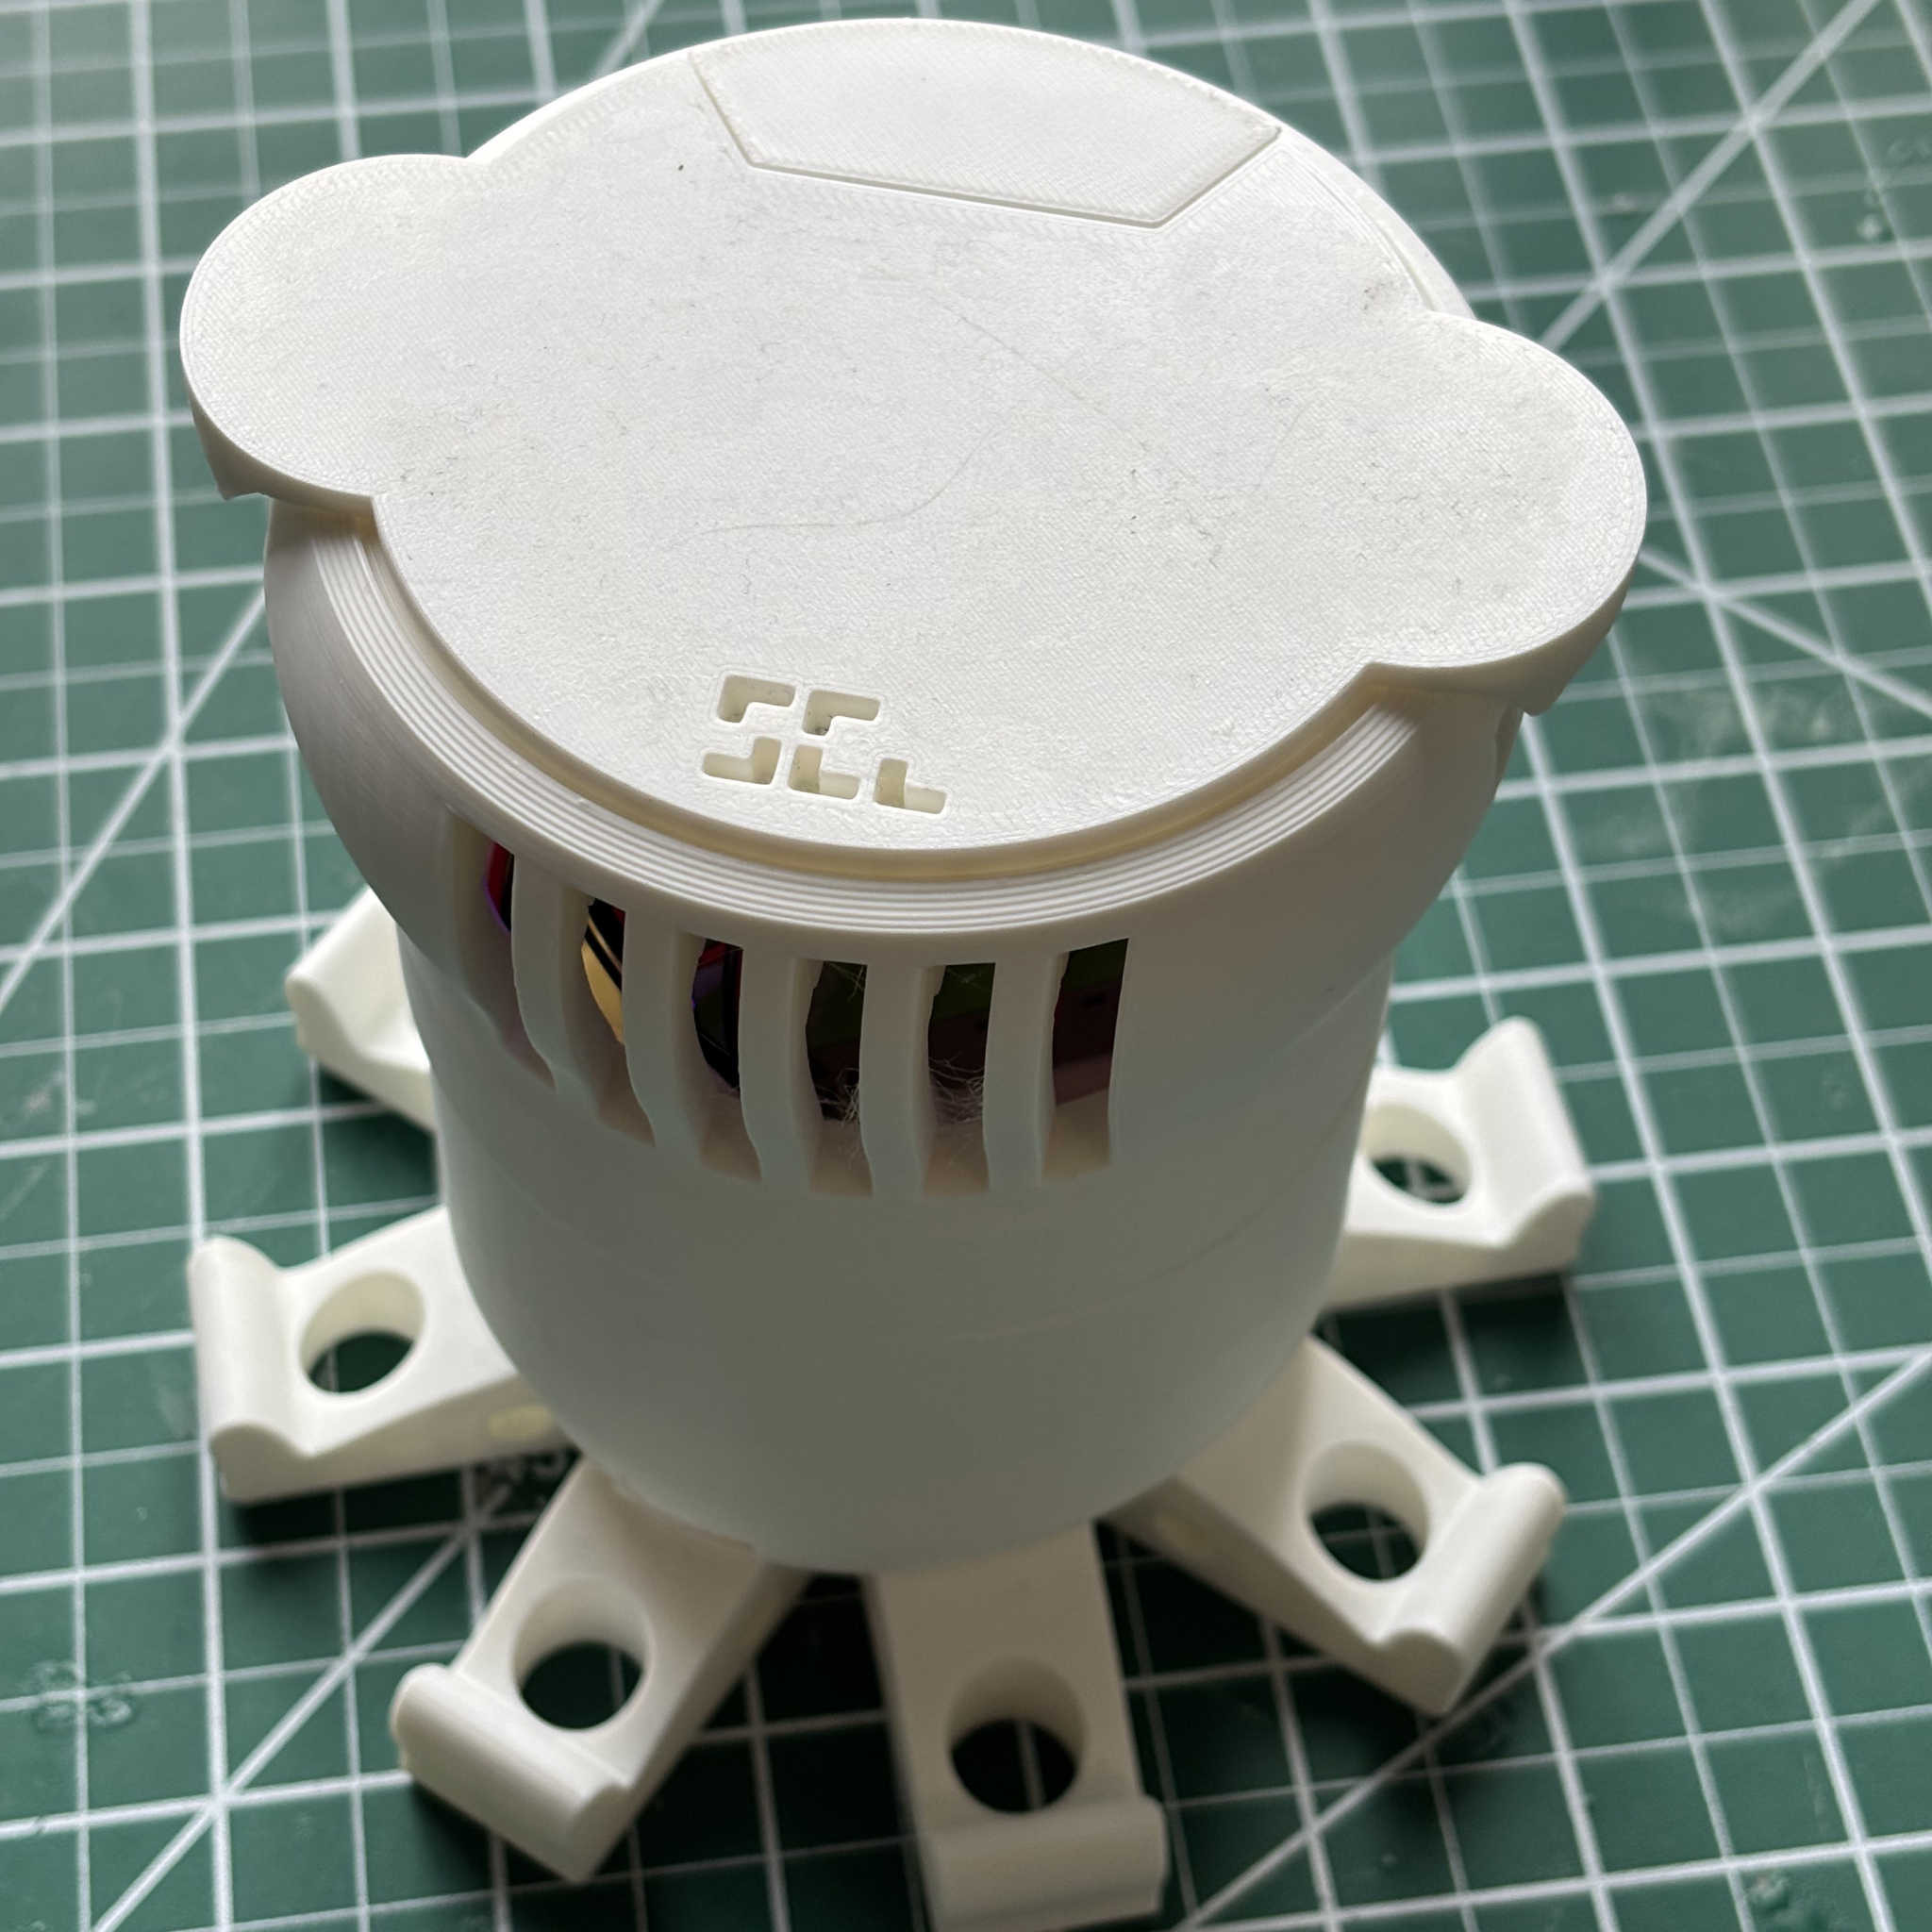
Ensure the wires are long enough to twist comfortably during this step.
Optional Mounting
Install a 1/4"-20 threaded insert:
1. Flip the bottom enclosure upside down
2. Place the insert in the designated hole
3. Use a soldering iron to press it into place
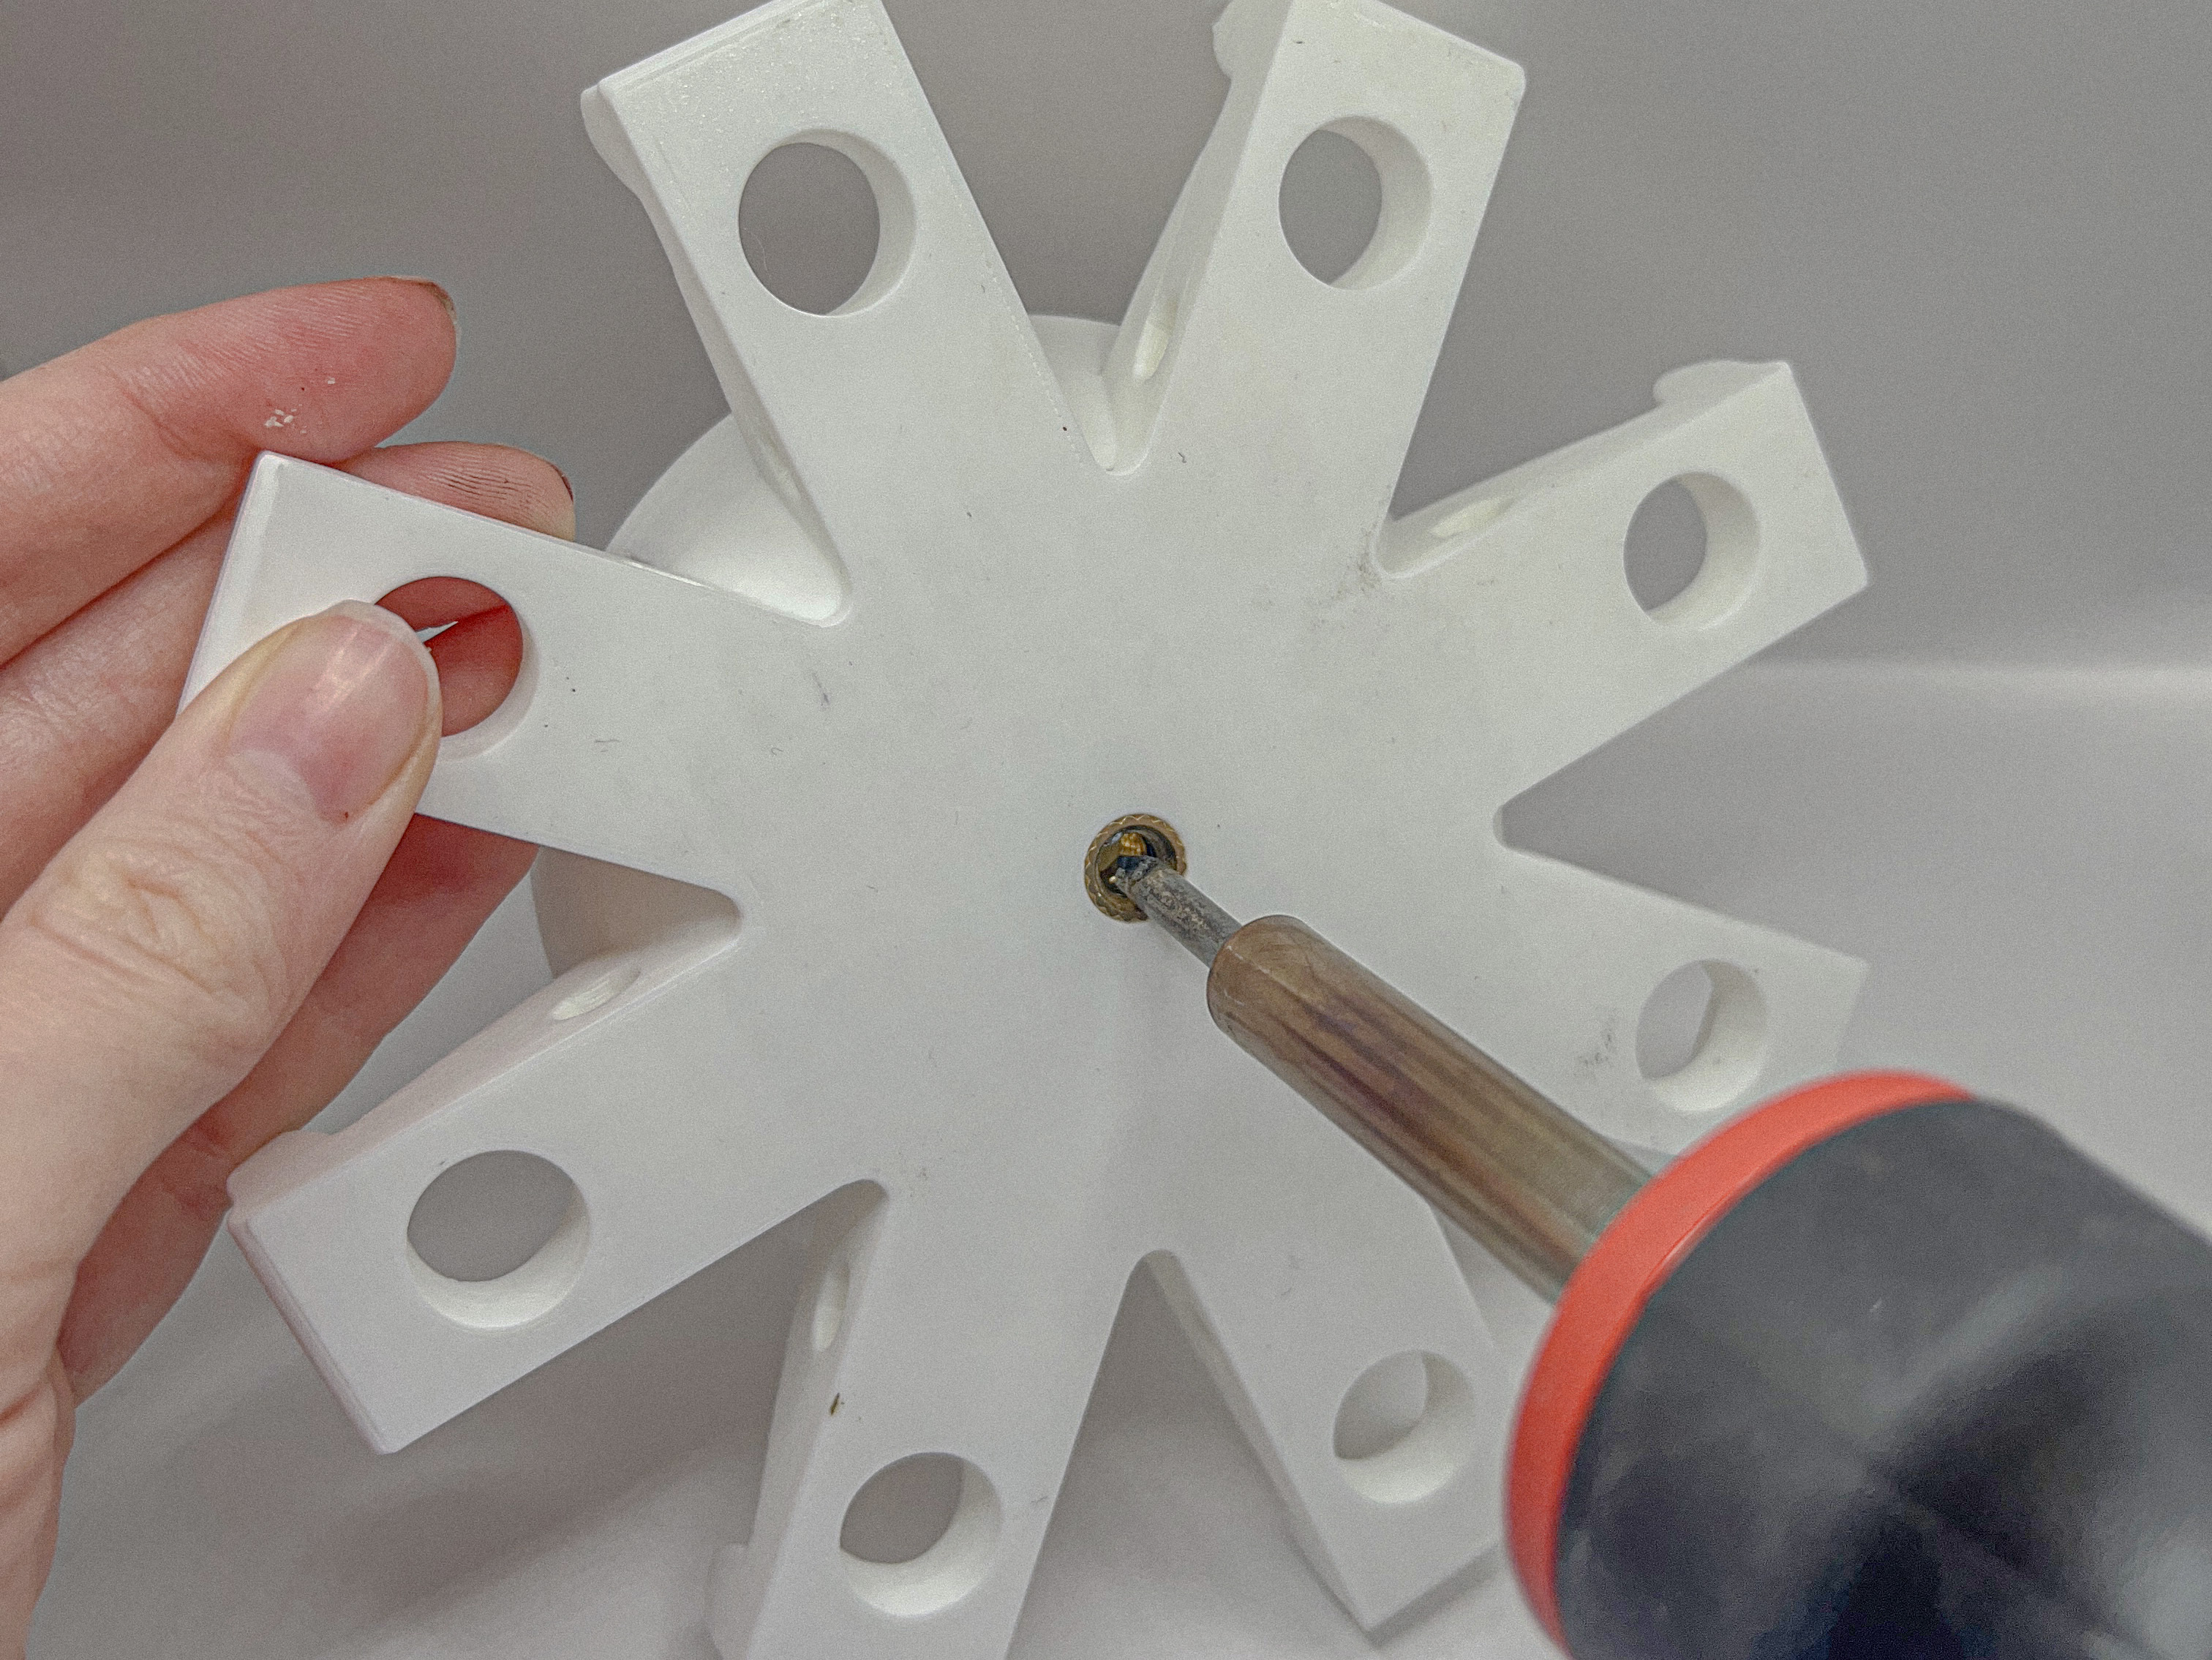
Keep the soldering iron at a 90° angle. Do not tilt the insert. Remove the iron immediately after insertion to avoid damaging the print.
2. Mobile Standard Configuration
(Adds GPS to Static Standard)
Follow all steps from Static Standard
Additional Steps
Place the GPS module on top of the battery in its designated slot in the bottom enclosure, and secure it with elastic bands
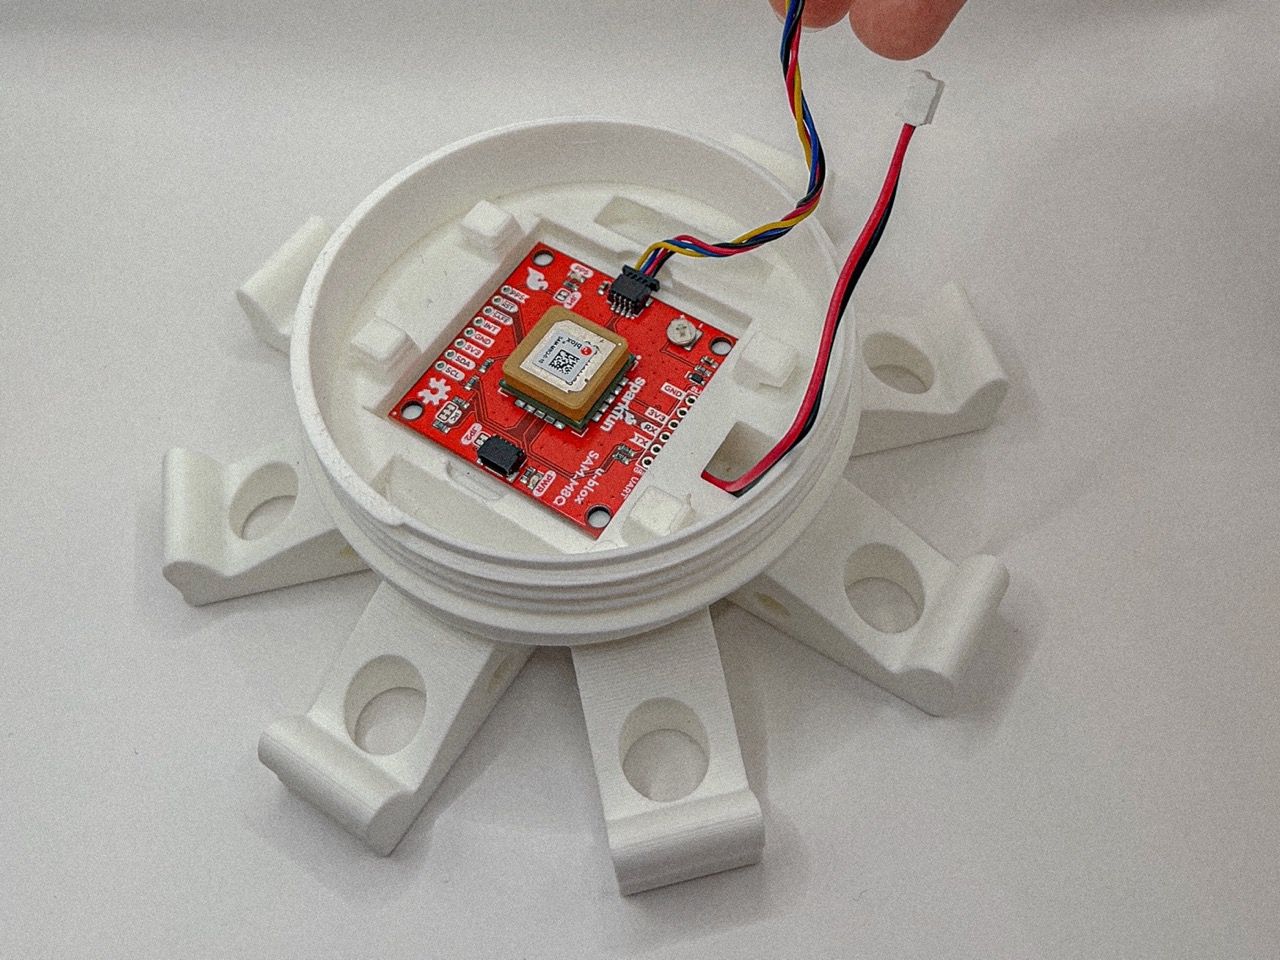
Connect the GPS module to the PCB via the QWIIC port.
3. Extended Configuration
(Adds air quality sensing – SPS30)
Build on Mobile Standard
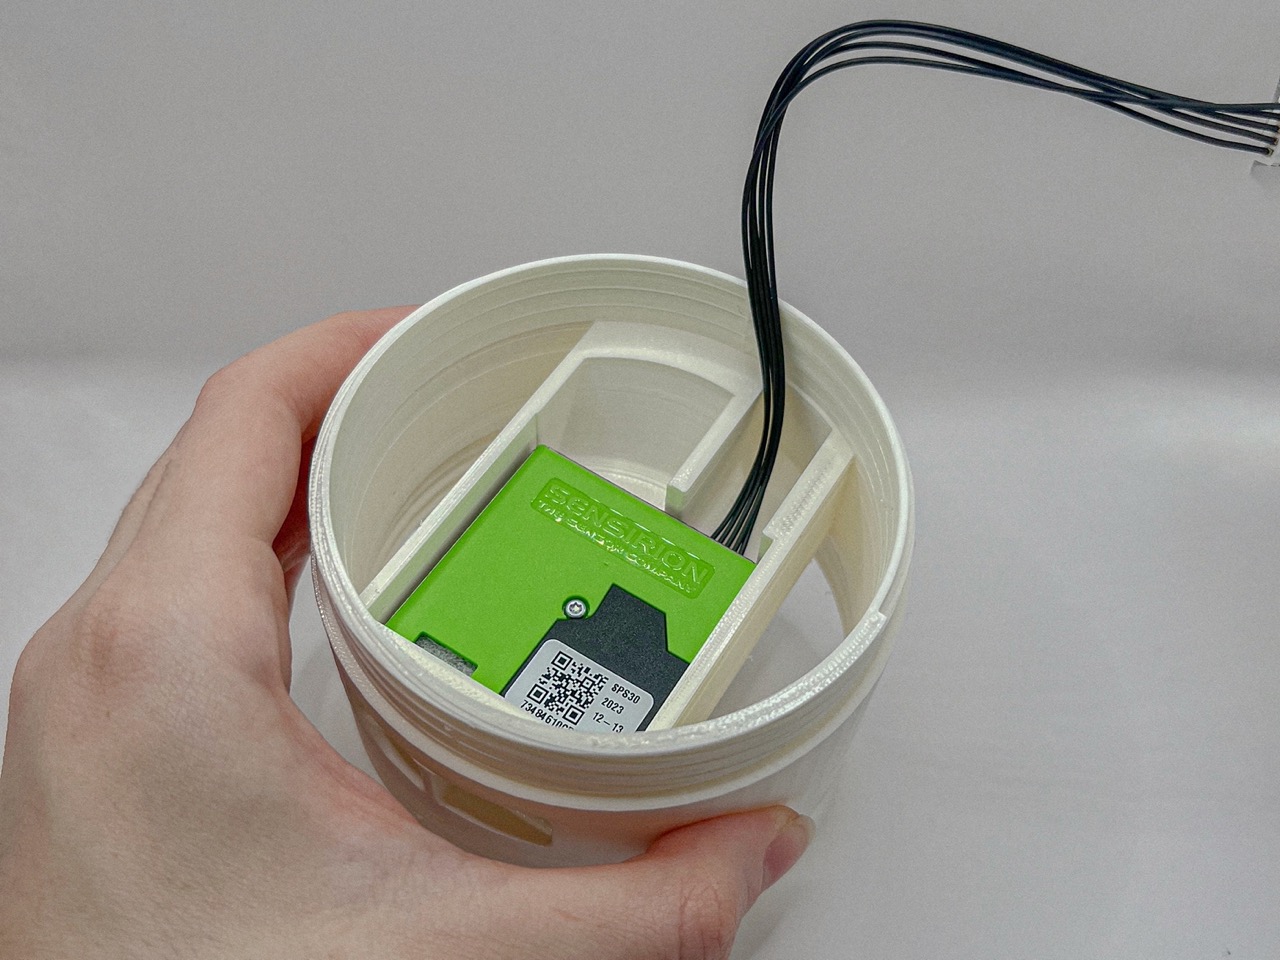
Step 1: Prepare Middle Layer
Insert the SPS30 air quality sensor into the middle enclosure.
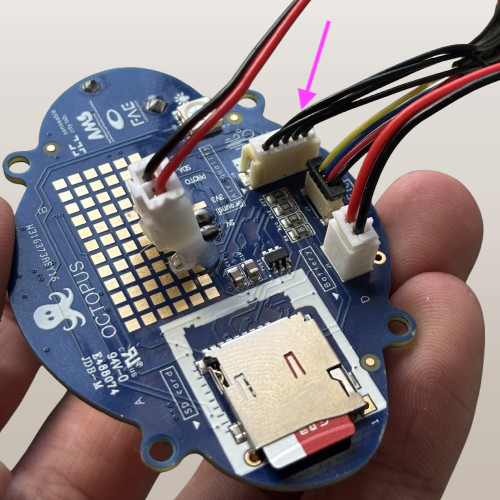
Step 2: Connect Sensor
Plug the SPS30 into the “air quality” port on the PCB.
Step 3: Final Assembly
Attach the middle section to the bottom section.
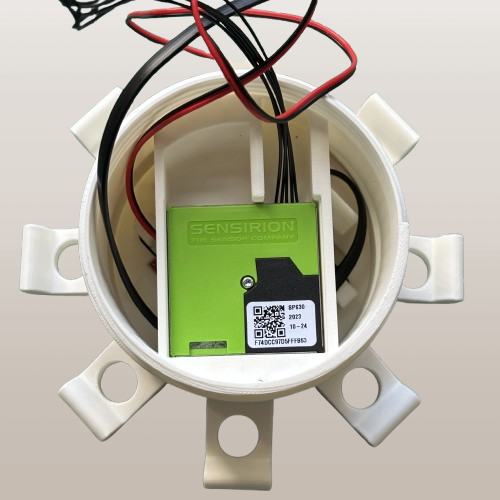
Hold wires while passing them through the middle section openings to prevent damage.
Attach the head section to complete the assembly.
4. Vision Configuration
(Camera-based sensing with Nicla Vision)
Build on Mobile Standard, but swap the Nano 33 BLE Sense for the Arduino Nicla Vision for image-based applications.
Camera must be centered on the PCB and aligned with the enclosure opening.
Your Octopus is now assembled! You’re ready to move on to setting up the Octopus Library.